Note: This page is for OTG 1.16.5 version of OTG. For 1.12.2, see GUI and Commands (1.12).
World Creation GUI
After following the Single Player Forge installation instructions you will be presented with the world creation GUI in game.
Once you have clicked Single Player -> Create New World -> More World Options, then World Type a few times until you see World Type: OTG then Customize, you will be presented with this screen. This GUI allows you to assign OTG presets to the normal Minecraft dimensions (Overworld / Nether / End) or to add them as separate stand alone dimensions which can be accessed via a portal.
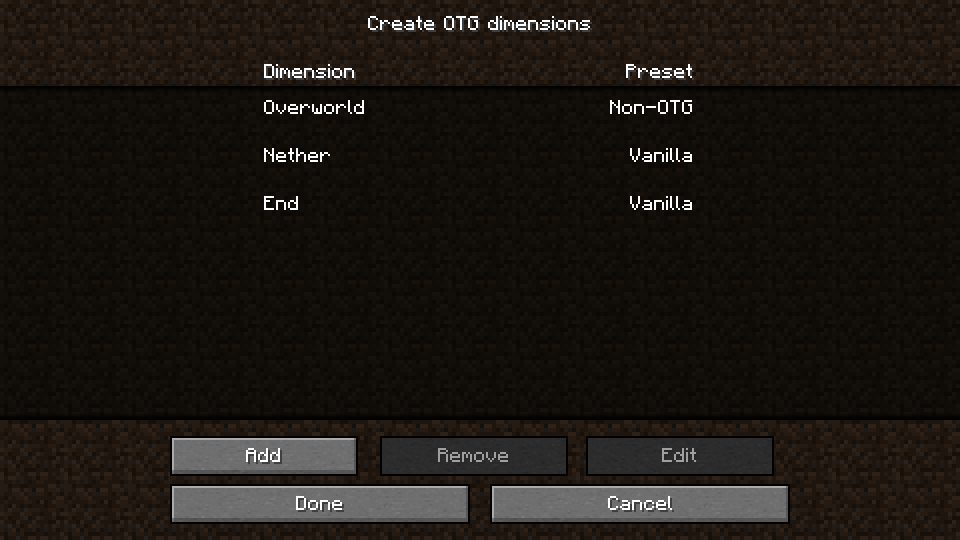 |
Clicking one of the normal Minecraft dimensions will allow you to choose from your list of installed presets which can be used for that world. Note that you do not need to use an OTG preset for these, you can also choose "Non-OTG" (which will present you with an option to choose a non-OTG world type) or "Vanilla" (which means OTG will not impact that dimension).
| ||
|---|---|---|---|
Note: OTG has a new (self-explanatory) world creation GUI for 1.16 Forge SP. Most commands on the 1.12 page also exist for 1.16.x, though some of the names/arguments have changed. Documentation is WIP, use /otg help, auto-complete or ask on Discord.